Set up your MDM account: Jamf Pro
| Important: Every effort has been made to provide information that is current and accurate. While this information is considered to be correct at the date of publication (February 2023), changes in content may impact the accuracy of the information. |
To use Jamf Pro with the Destiny Resource Manager Mobile Device Management (MDM) Integration feature, you need to do some setup.
User Accounts and Groups
To utilize all the features in the Destiny MDM integration, you must have either Administrator or Custom privileges and access levels set up to be able to control managed devices in your Jamf Pro account.
- Log in to your Jamf Pro account.
- In the top-right corner, click the settings icon.

- Click User accounts and groups.
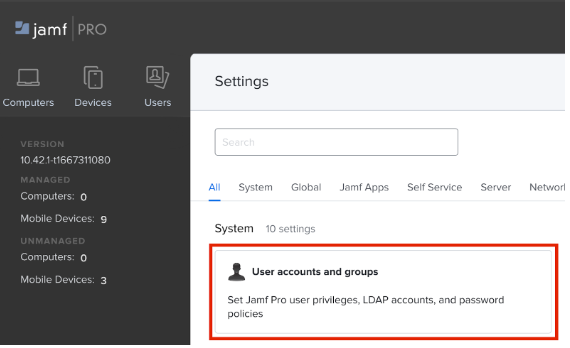
- Select the user who will manage your devices through Destiny MDM.
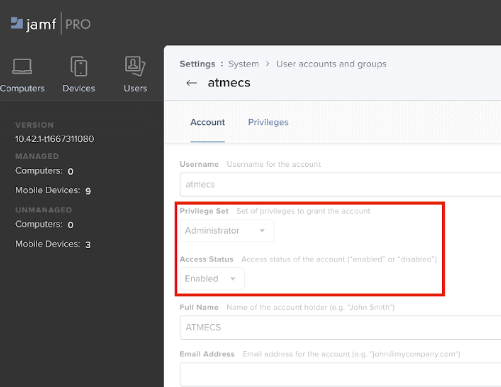
- On the Account tab, verify:
- The user's Privilege Set is either Administrator or Custom.
- The Access Status is set to Enabled.
- Click the Privileges tab.
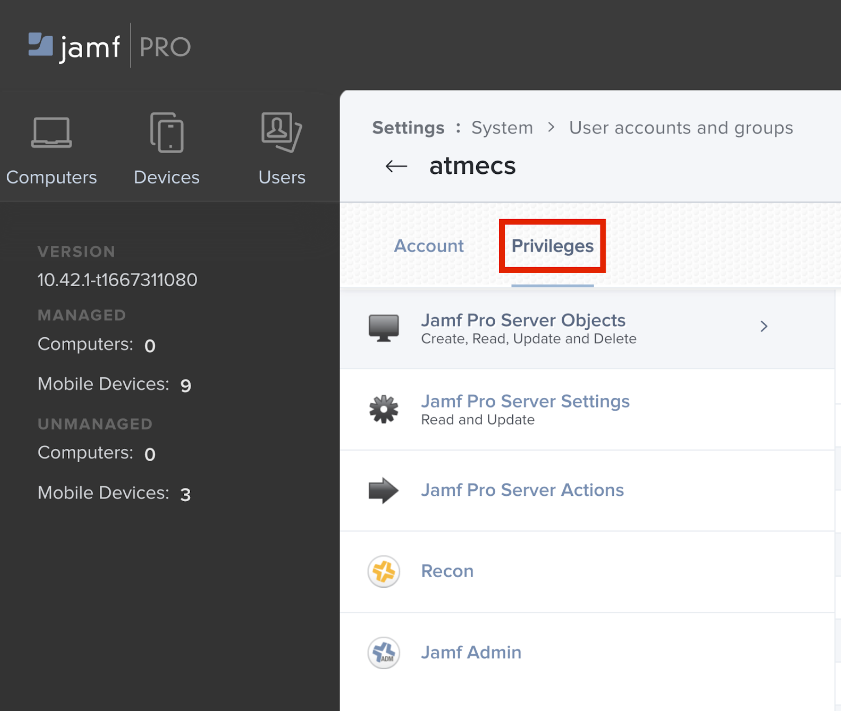
- Under Jamf Pro Server Objects, ensure the Create, Read, and Update checkboxes are selected for the following:
- API Integrations
- Buildings
- Departments
- Device Name Patterns
- GSX Connection Keystores
- Jamf Pro User Accounts & Groups
- JSON Web Token Configurations
- Keystores
- Mobile Devices
- Push Certificates
- Remote Administration
- Smart Mobile Device Groups
- Static Mobile Device Groups
- Users
- Webhooks
- Ensure the Delete box is also checked.
- Click the Jamf Pro Server Actions tab.
- Select the checkboxes to enable the following:
- Flush MDM Commands
- Send Blank Pushes to Mobile Devices
- Send Declarative Management Command
- Send Inventory Requests to Mobile Devices
- Send Mobile Device Bluetooth Command
- Send Mobile Device Diagnostics and Usage Reporting and App Analytics Commands
- Send Mobile Device Lost Mode Command
- Send Mobile Device Managed Settings Command
- Send Mobile Device Remote Lock Command
- Send Mobile Device Remote Wipe Command
- Send Mobile Device Remove Passcode Command
- Send Mobile Device Remove Restrictions Password Command
- Send Mobile Device Restart Device Command
- Send Mobile Device Set Activation Lock Command
- Send Mobile Device Set Device Name Command
- Send Mobile Device Shared Device Configuration Commands
- Send Mobile Device Shared iPad Commands
- Send Mobile Device Shut Down Command
- Send Set Recovery Lock Command
- Send Update Passcode Lock Grace Period Command
- Unmanage Mobile Devices
- Update Declarative Management
- View Activation Lock Bypass Code
- View License Serial Numbers
- View MDM command information in Jamf Pro API
- View Recovery Lock
Device Groups
Both Smart Groups and Static Groups are supported.
| Note: Smart Groups are recommended and allow access to additional functionality. |
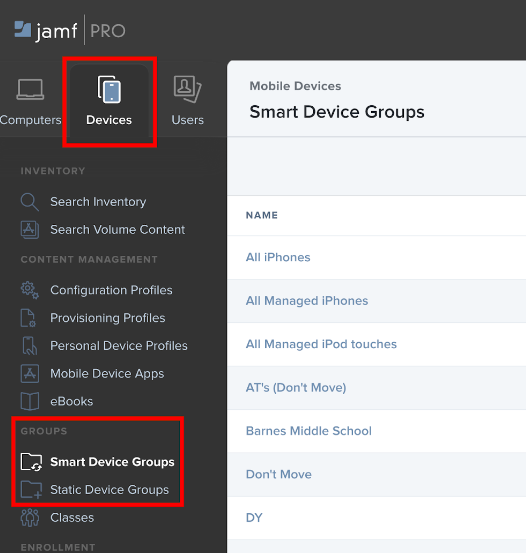
On the Jamf Pro dashboard, click Devices, and then select Smart Device Groups or Static Device Groups.
Set Smart Groups criteria
For additional functionality in Destiny MDM, Smart Groups can only have one Criteria that is defined as Building.
| Important: Smart Groups that do not meet this requirement will not show up in the list of Smart Groups when configuring Destiny-to- Jamf Pro mappings. |
To verify Smart Groups meet this requirement:
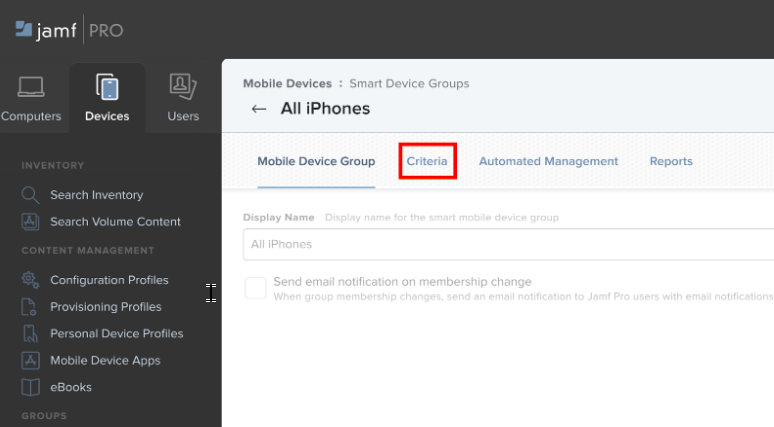
- On the Jamf Pro dashboard, click Devices.
- Click Smart Device Groups.
- From the NAME column, select a Smart Group.
- Click the Criteria tab.
- In the bottom-right corner, click Edit.
- Verify there is only one criteria listed that:
- Is defined as Building.
- Uses the Operator "is".
- Has a unique Value.

- Click Save.
Supervised Commands
Some Jamf Pro mobile device commands, including the following, require a device to be supervised:
- Enable/Disable Lost Mode
- Shut Down Device
- Clear Screen Time Passcode
- Restart Device
To utilize these features on devices in Destiny MDM, you will need to verify they are supervised.
To verify devices are Supervised:
- On the Jamf Pro dashboard, click Devices.
- To find the device you want to check, do either of the following:
To use a keyword search... To view a list... - Click Search Inventory.
- Input search parameter(s). (Optional)
- Click Search.
Click Smart Device Groups or Static Device Groups.
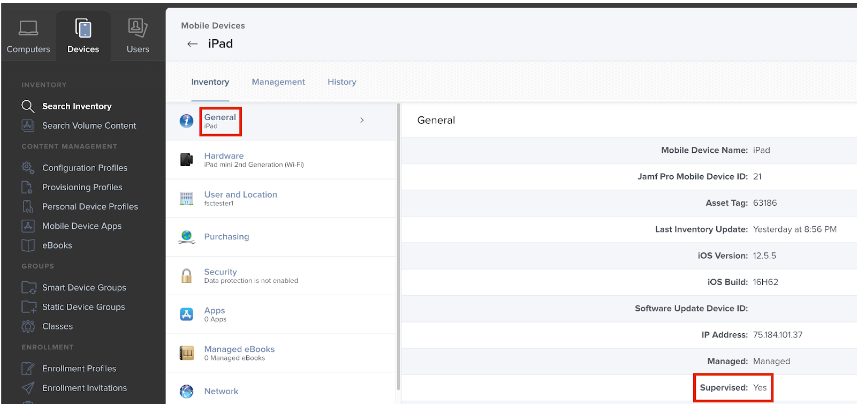
- Once you have selected a device, click the General tab to verify Supervised is set to Yes.
